Building the Web-Based 3d Digital Experience for the Mayflower Autonomous Ship
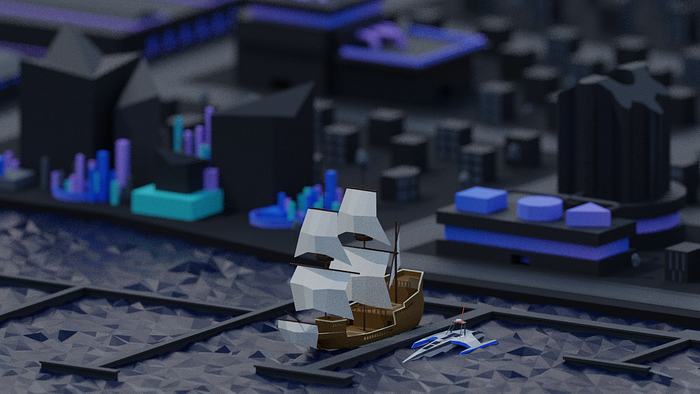
At the start of this year, my colleague Gwilym Newton and I were fortunate enough to be given the opportunity to design and build a web-based 3d digital experience to showcase the technology behind IBM’s Mayflower Autonomous Ship (MAS). With no human captain or onboard crew, MAS uses the power of AI and automation to traverse the ocean in its mission of research and discovery.
This article is a high-level overview of the tech stack, architecture and game management system constructed for the digital experience. We also have other related articles available that deep-dive into particular topics too, in some cases, focussing on a how a particular challenge (the experience is made up of the “Harbour” plus 3 distinct challenges) was constructed.
- Optimizing a Large-Scale Babylon.js scene [The Harbour]
- Data-driven scenes in BabylonJS [Challenge 1] (Coming Soon..)
- Developing a Data-Driven Game & Wind Animation with d3.js [Challenge 2]
- Interactive experiences in BabylonJS — focus on HTML/d3 overlays to BabylonJS objects. [Challenge 3] (Coming Soon..)
Architecture & Tech Stack
The overall experience and game management is built as a Vue.js application, within which we use Babylon.js, for 3d rendering, and D3.js, for data visualisation. It is worth noting though that Vue could easily be substituted with any other JavaScript UI framework like React or Angular.
Our experience is broken into 4 distinct “scenes”:
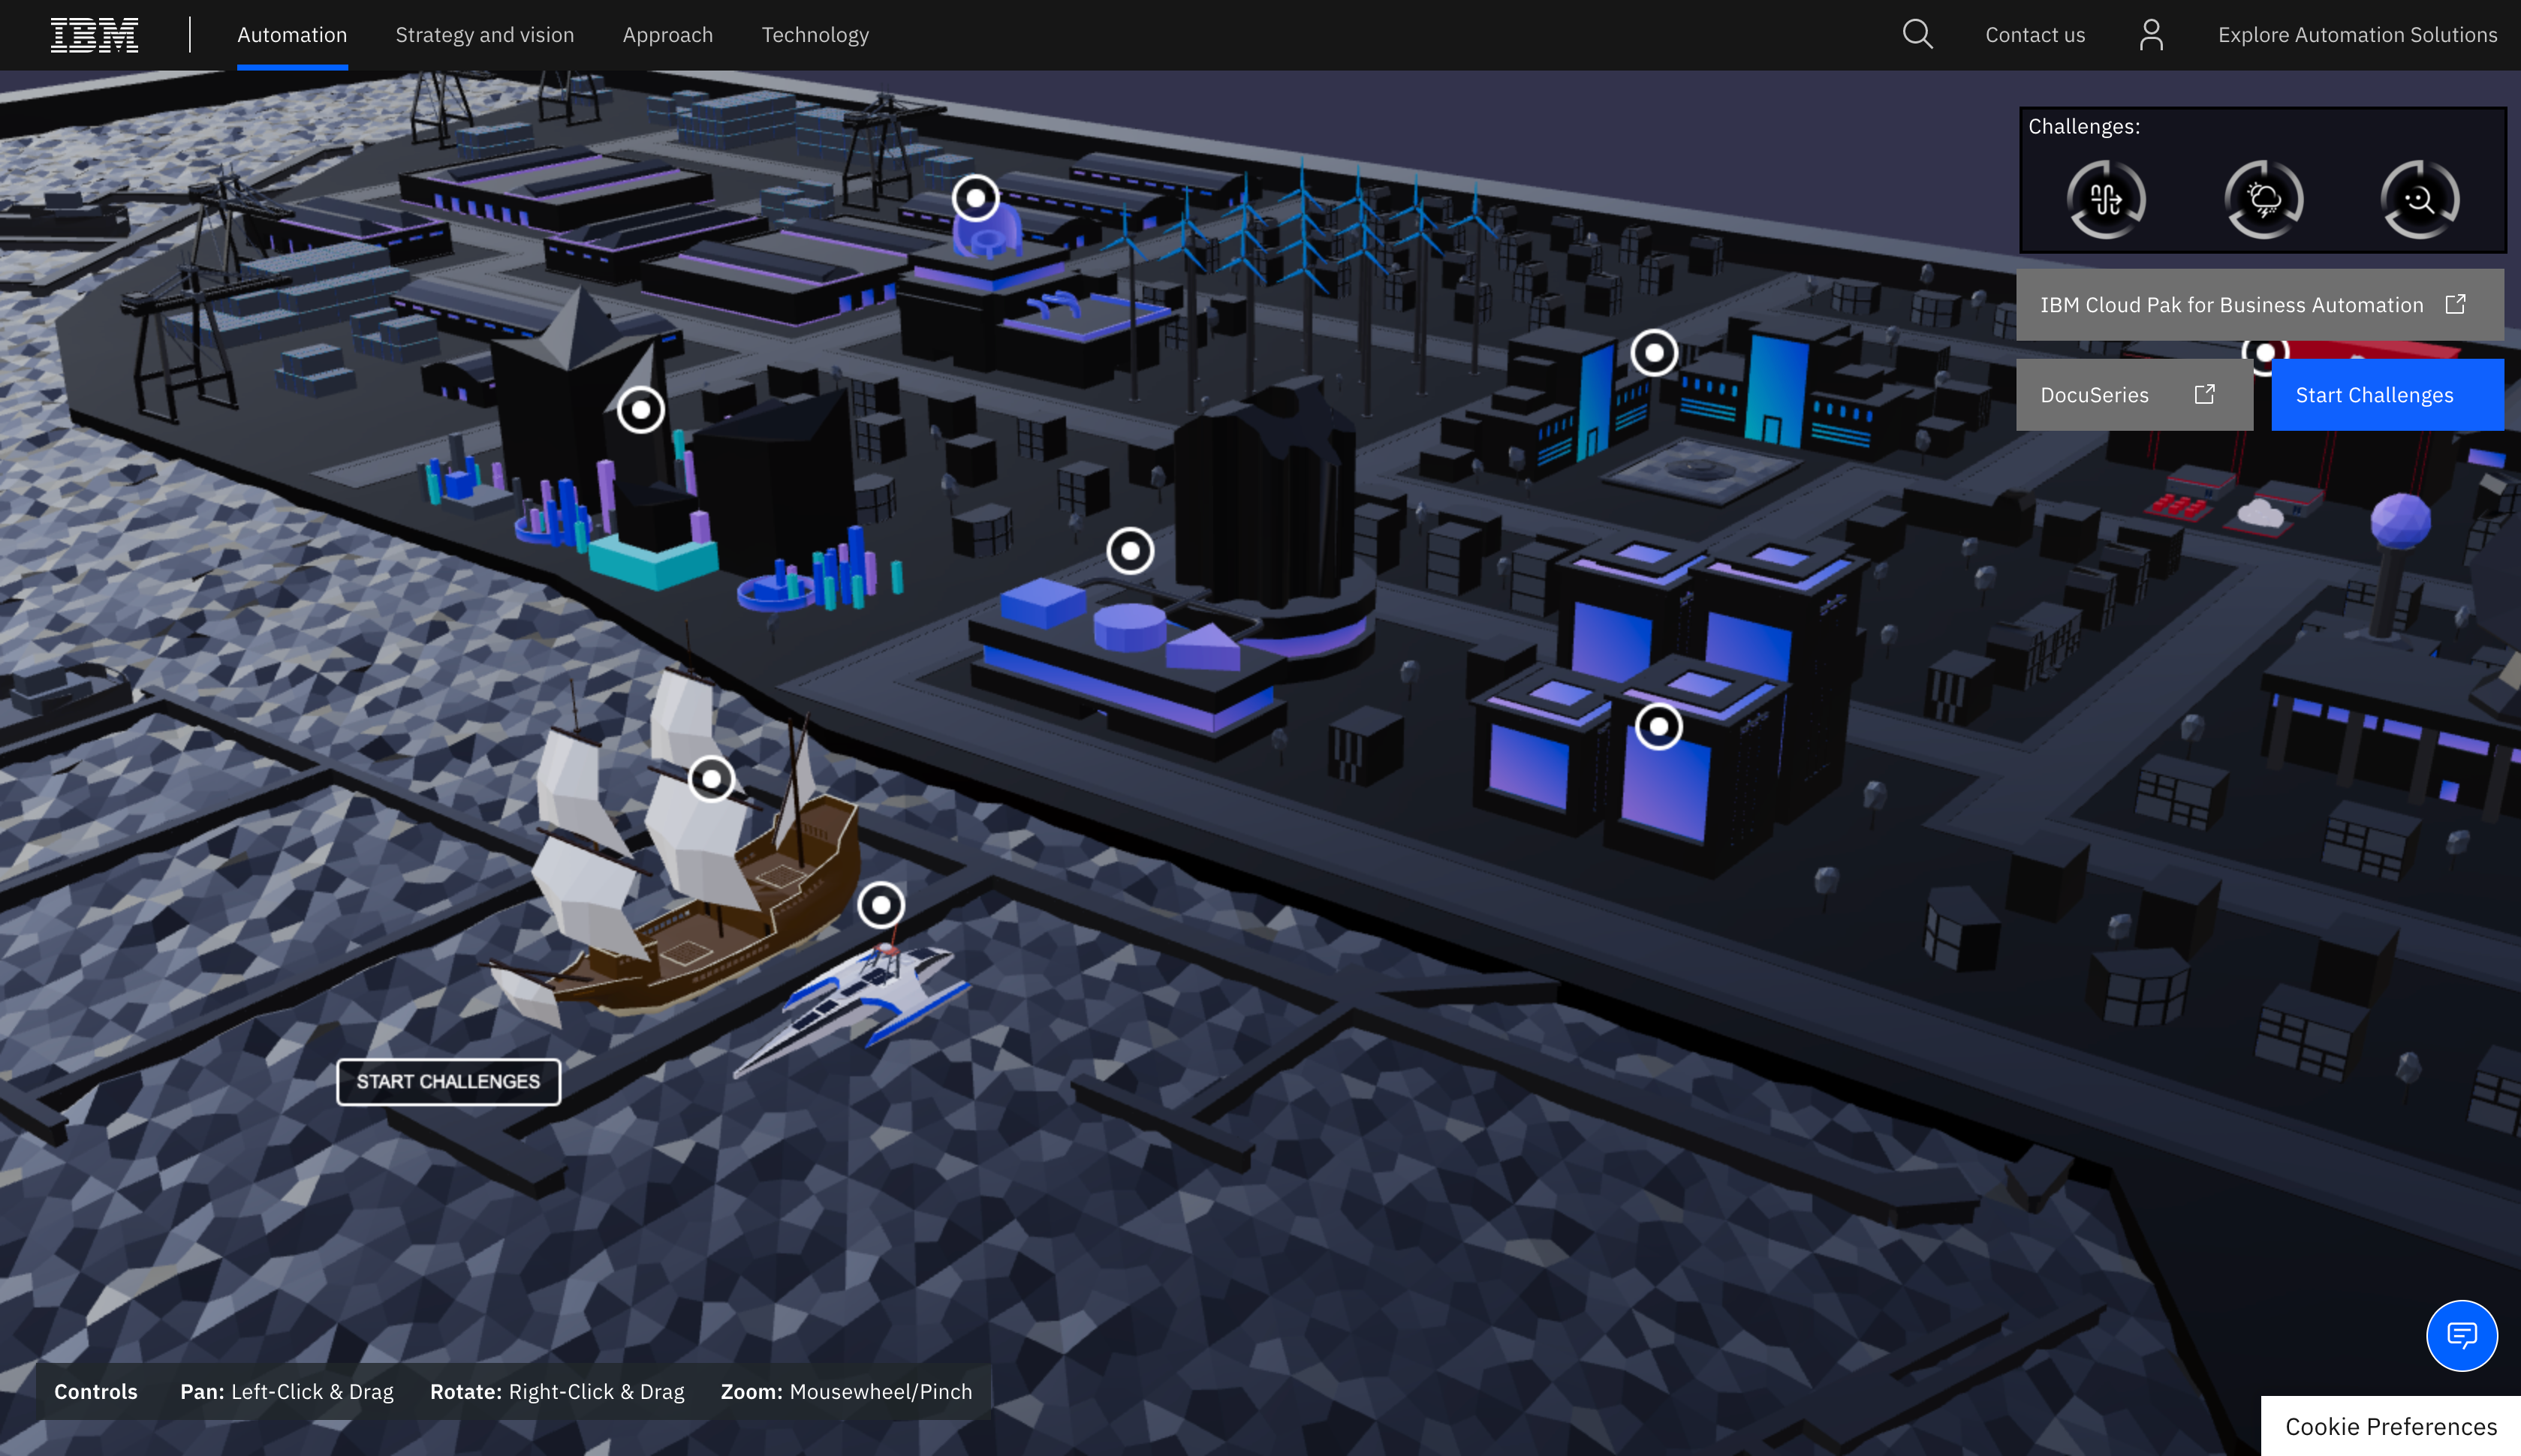
- The Harbour (top-left) — The entry point to the whole experience, advertising the various technologies used on the MAS, and linking out to the individual challenges that deep-dive into some of these technologies. The harbour scene is a static 3d model, rendered, and made interactive through Babylon.js.
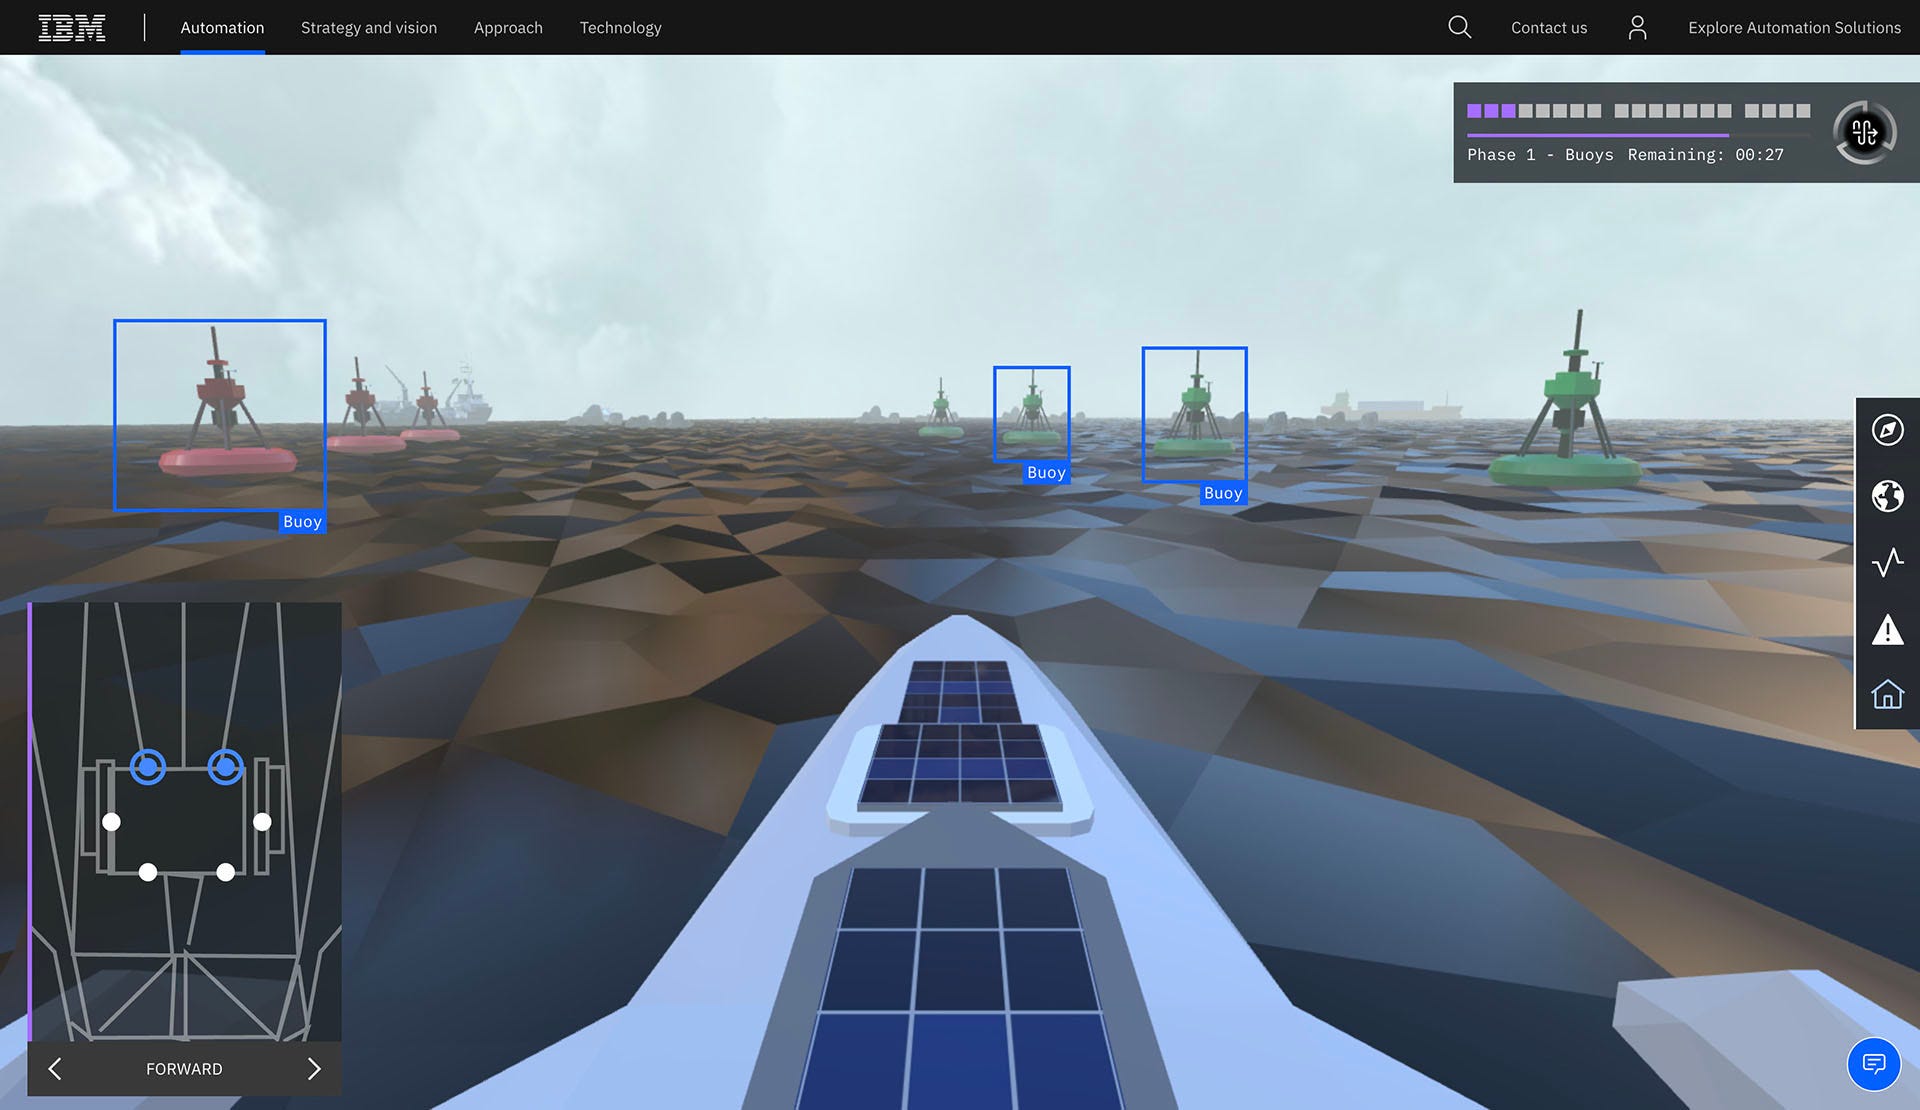
- Challenge 1: Obstacles (top-right) — Educating users how machine vision models are trained in Maximo Visual Inspection. This challenge shows a first-person view, rendered with Babylon.js, from the cameras onboard the MAS. It requires users to click/tap different entities (rocks, buoys & ships) in order to train MAS’ vision models. This scene is full data-driven, with object locations and paths all defined in external json files. You can read more about how we did this here (coming soon…).
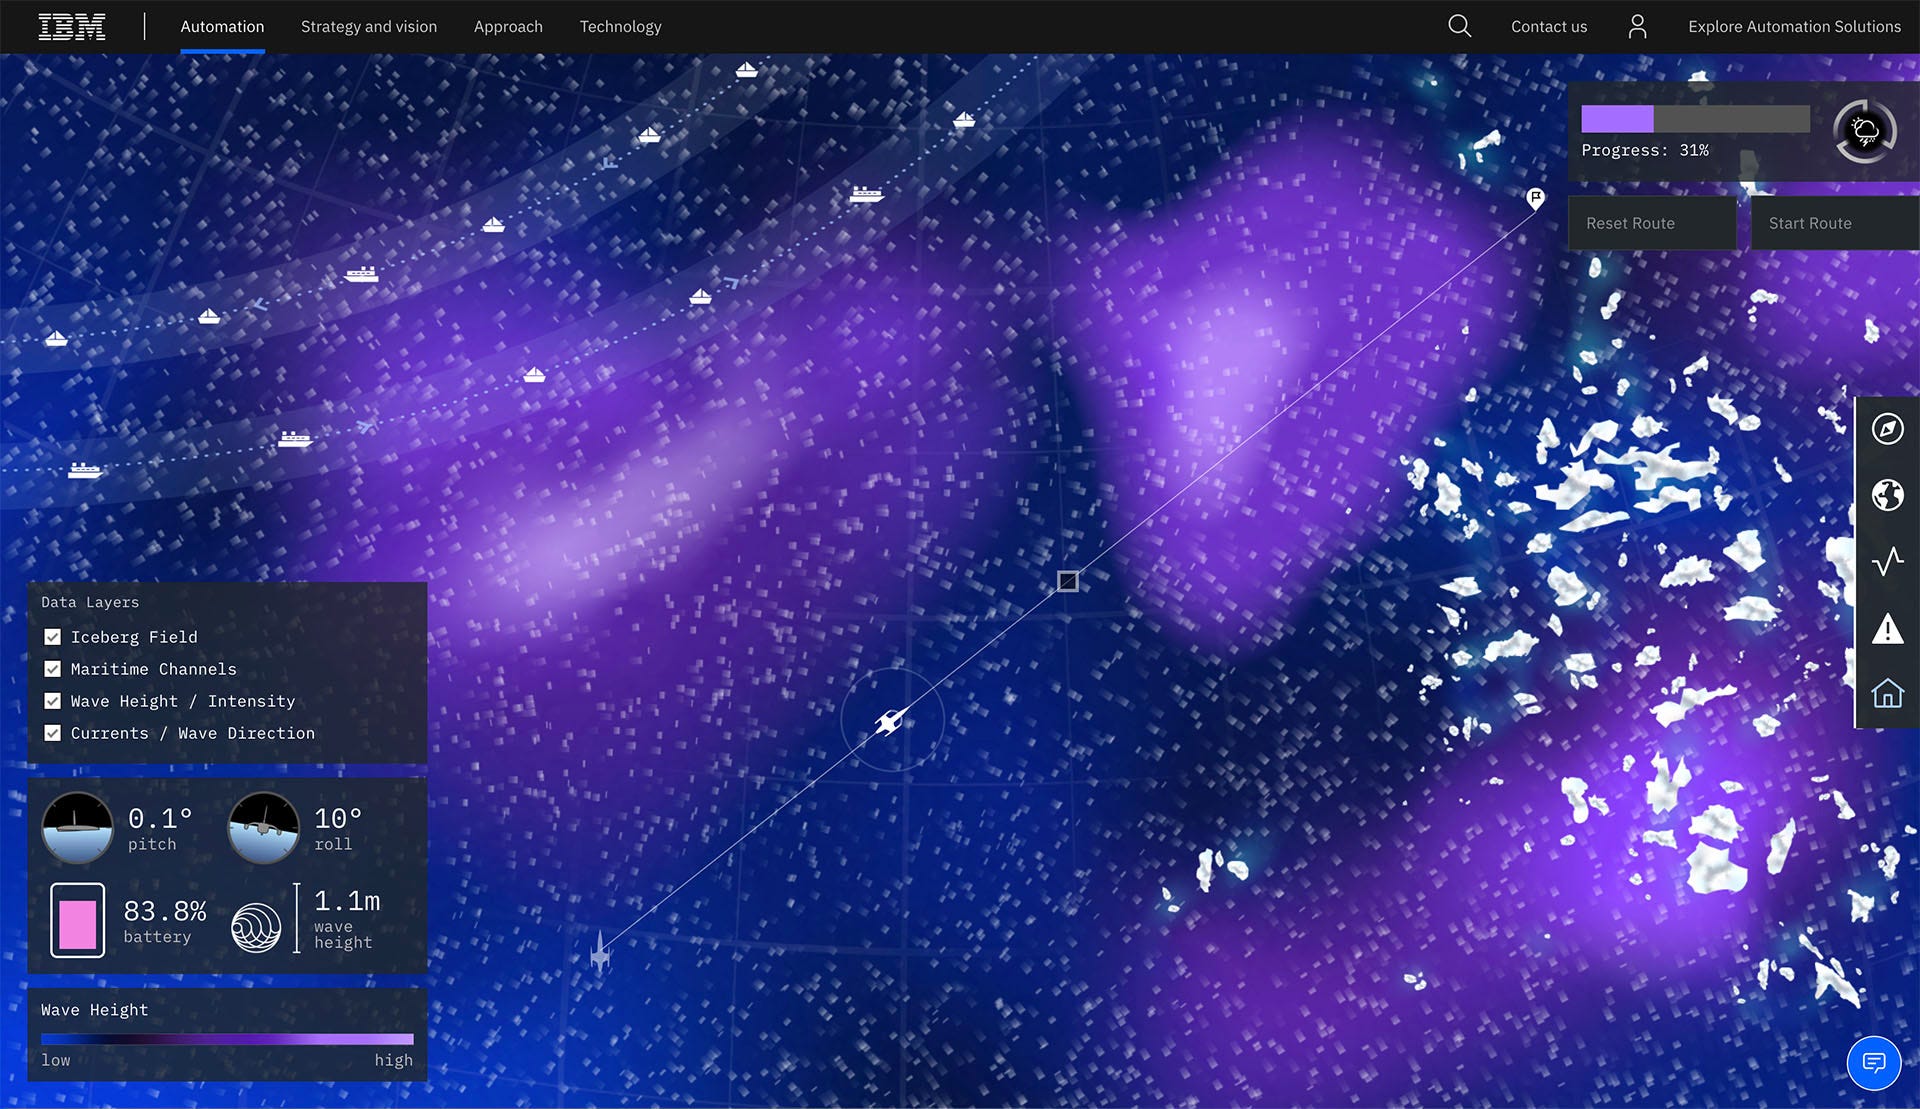
- Challenge 2: Environment (bottom-left) — Multiple layers of data sets define various factors that the Mayflower has to contend with when navigating the natural ocean environment. d3.js is used to visualise these layers (including wave direction & intensity) and sample the hidden data layers that provide the “live” data at any position on the screen. You can read more about how we did this here (coming soon…).
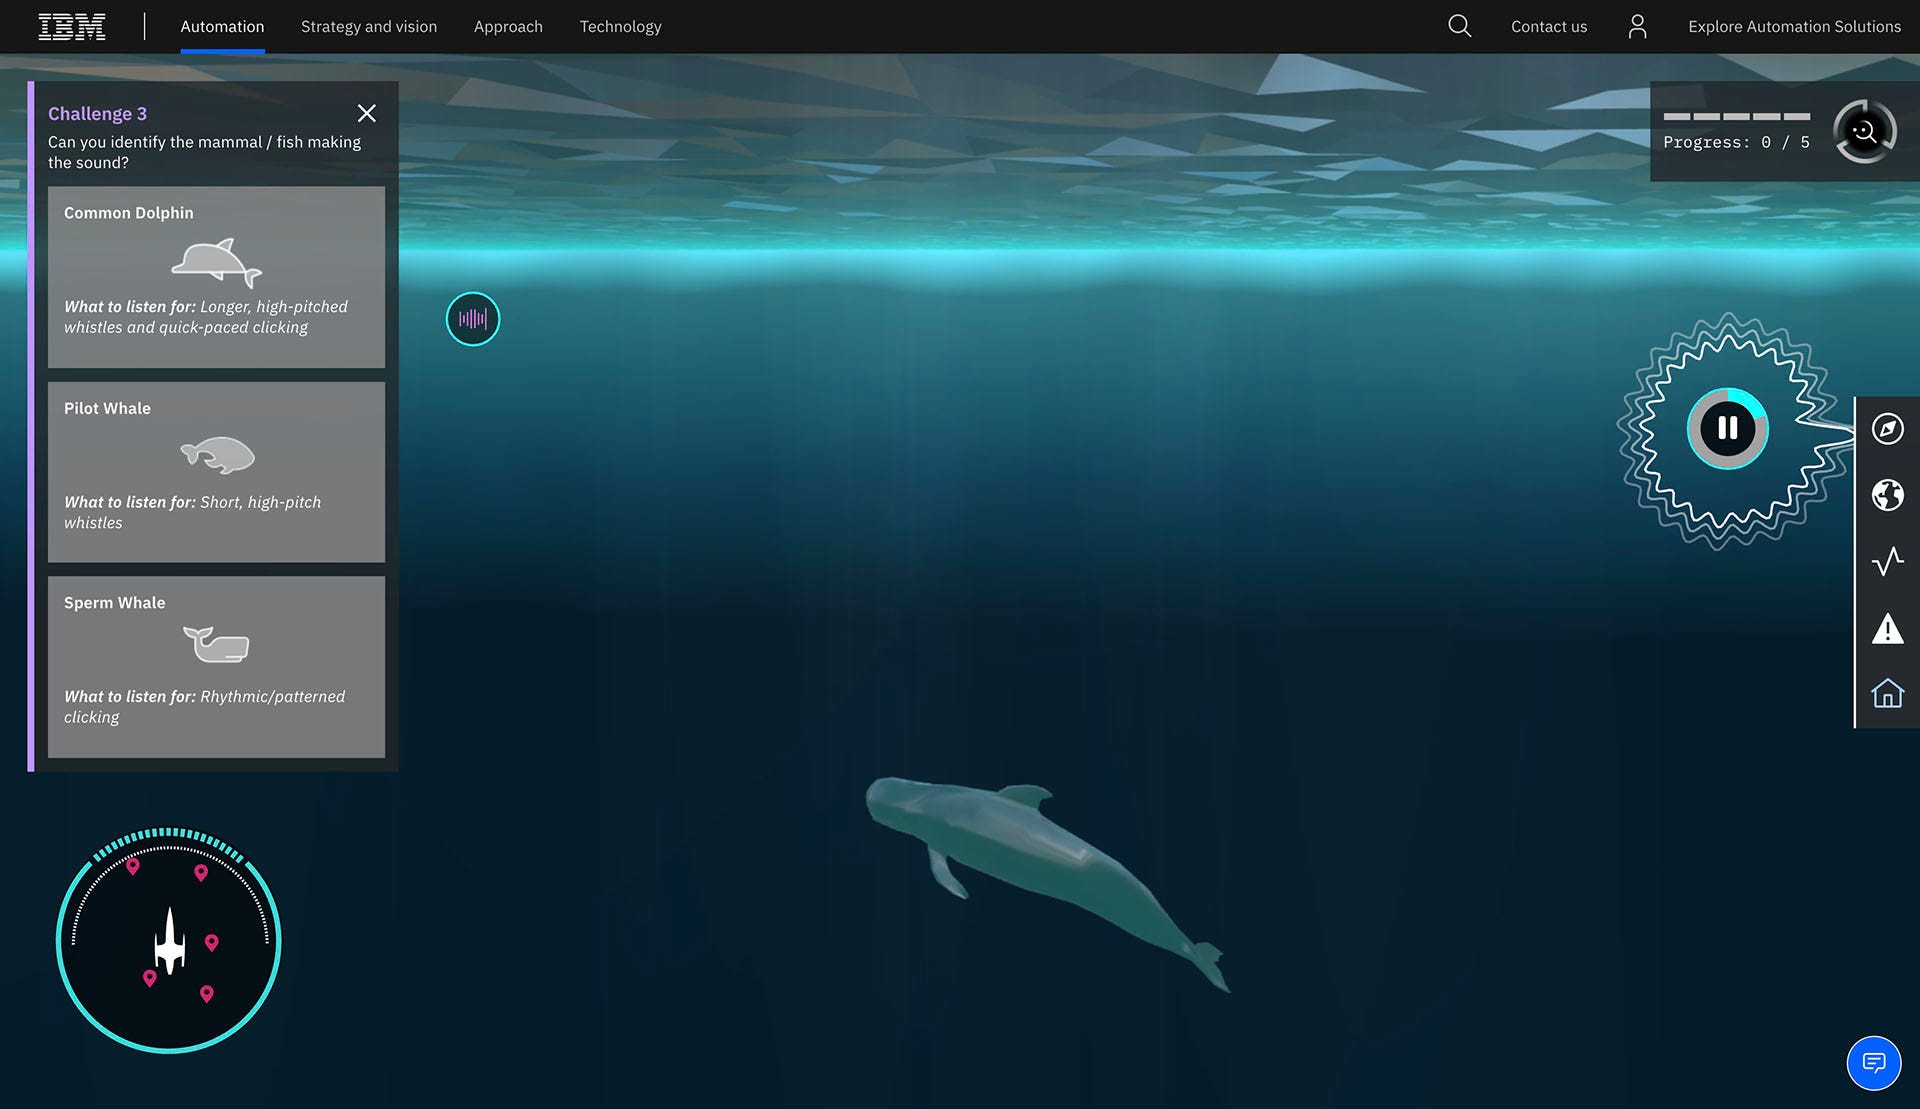
- Challenge 3: Discovery (bottom-right) — An underwater experience in which the user must search for and classify different audio samples of marine life. Uses Babylon.js to render the underwater scene, then d3.js to visualise the audio files. The visualisations track the location of the 3d objects in Babylon.js onto the 2d SVG-based UI. You can read more about how we did this here (coming soon…).
As for the tech stack used to build these scenes, we have three primary JavaScript libraries being used:

Babylon.js
An open-source 3d render engine for the web. We chose Babylon.js over Three.js because it was just so much easier to get started with.
Their documentation is thorough, and there is an ever-growing community on their well-supported forums, a place that we relied on several times throughout the project.
Babylon’s support for PBR Materials, Node Material Editor and its Playground make it an excellent, and quite frankly fun, resource to develop with.

D3.js
d3.js is widely accepted as the industry standard for 2d data visualisation on the web. Whilst there are many other JavaScript charting libraries available, particuarly if you’re looking to use “standard” chart types liike line/bar/pie charts, d3.js offers an API at a very low level in the visualisation domain. Although d3.js does have a very steep learning curve, the flexibility and power of its data-driven document architecture provides a level of customisation that is not rivalled and empowers infinite possibilities of interactive visualisations.

Vue.js
Specifically, we were using Vue 2.0. Over the years, we have found Vue.js to be a beautifully lightweight web UI framework to work with.
For junior developers, it is easy to pick up, and its opinionated structure has meant that when you’re reading code written by other developers, it is easy to read and follow.
To ensure good practices and structure of our codebase, we used the Vue.js cli to give us our starting project. Then, given our additional requirements of Babylon scenes, we also added a dedicated `/scenes` folder, leaving us with this high-level project layout:
/src
  /assets        // Images, textures, etc.
  /components    // Vue components reusable across the App
  /locales       // Stores our .json files for translation
  /plugins       // Vue.js Plugins
  /scenes        // folders with Vue components & Babylon scenes
  /services      // JS files for accessing common APIs & services
  /stylesheets   // All common CSS/SCSS styling
  /views         // Vue components that correspond to pages in UI
  App.vue
  main.js
  router.js
Scene Management
Each of our Babylon scenes, which had their own dedicated folder inside ./scenes, are defined as <scene-name>.scene.js and <scene-name>.vue files.
Each of the .scene.js files exports at a minimum, a createScene(engine, canvas) function that requires reference to a Babylon engine and to the HTML canvas where the scene will be rendered.
/*
Example of a <scene-name>.scene.js file based on the default Babylon Playground Scene
*/import * as BABYLON from ‘babylonjs’;var sphere = null;function createScene (engine, canvas) {
  // This creates a basic Babylon Scene object (non-mesh)
  var scene = new BABYLON.Scene(engine);  // This creates and positions a free camera (non-mesh)
  var camera = new BABYLON.FreeCamera("camera1", new BABYLON.Vector3(0, 5, -10), scene);  // This targets the camera to scene origin
  camera.setTarget(BABYLON.Vector3.Zero());  // This attaches the camera to the canvas
  camera.attachControl(canvas, true);  // This creates a light, aiming 0,1,0 - to the sky (non-mesh)
  var light = new BABYLON.HemisphericLight("light", new BABYLON.Vector3(0, 1, 0), scene);  // Default intensity is 1. Let's dim the light a small amount
  light.intensity = 0.7;  // Our built-in 'sphere' shape.
  sphere = BABYLON.MeshBuilder.CreateSphere(
    "sphere",
    {diameter: 2, segments: 32},
    scene
  );  // Move the sphere upward 1/2 its height
  sphere.position.y = 1;  // Our built-in 'ground' shape.
  var ground = BABYLON.MeshBuilder.CreateGround("ground", {width: 6, height: 6}, scene);  return scene;
}export {
  createScene
}
This function defines the Babylon code that will build our 3d world. If you’ve used Babylon’s Playground at all, you will recognise the function createScene() from there.
The .vue files are then used to define a Vue component that can be pulled into whichever page or view requires it. The file mostly contains the setup JavaScript found within Babylon’s Getting Started guide.
/*
Extracts from the <script /> section of a `<scene-name>.vue file
*/import * as Scene from './<scene-name>.scene.js'let babylon = {
  engine: null,
  scene: null
}export default {
  ...
  mounted () {
    let vue = this
    vue.canvas = vue.$refs['scene']; // Get the canvas element
    // Generate the BABYLON 3D engine
    babylon.engine = new BABYLON.Engine(vue.canvas, true);
    this.loadScene(Scene.createScene(babylon.engine, vue.canvas));
  },
  methods: {
    loadScene (scene) {
      let vue = this;      if (babylon.engine) {
        vue.engine.stopRenderLoop()
      }      if(babylon.scene) {
        // ensure we only have one active Babylon scene
        babylon.scene.dispose();
      }

      babylon.scene = scene;

      // Register a render loop to repeatedly render the scene
      babylon.engine.runRenderLoop(function () {
        babylon.scene.render();
      });      // Scene has finished loading
      babylon.scene.executeWhenReady(() => {
        // do stuff when scene is ready
      })      // Watch for browser/canvas resize events
      window.addEventListener("resize", function () {
        babylon.engine.resize();
      });
    }
  }
}
To load our .scene.js inside the .vue component, we utilise the `mounted` lifecycle hook. Here, we select the canvas from our defined HTML, create a new Babylon engine, and then call our scene’s createScene() function in order to load the scene into the respective canvas element.
Communicating between Babylon.js & Vue.js
Within the digital experience, there were several occasions where we wanted to be able to update content in our Vue components based on data or events generated in Babylon, and, inversely, control content in the Babylon.js scene from the Vue component, e.g. through a Vue button click.
Controlling Babylon.js content from Vue.js
Controlling the Babylon.js scene from Vue is fairly straight forward. We can define additional functions within our <scene-name>.scene.js and export them.
/*
Example of a <scene-name>.scene.js file with an added export function to manipulate the scene from external files.
*/import * as BABYLON from ‘babylonjs’;var sphere = null;
function createScene (engine, canvas) {
  ...
}// move the sphere up 1 unit in the z-axis
function moveSphere () {
  sphere.position.z += 1;
}export default {
  createScene,
  moveSphere
}
Then, when these files are imported into <scene-name>.vue we now have access to these functions with Scene.moveSphere().
/*
Extract from the <script /> section of a `<scene-name>.vue file that shows a demo of calling a Scene function, e.g. moveSphere
*/import * as Scene from './<scene-name>.scene.js'export default {
  ...
  mounted () {
    ...
  },
  methods: {
    ...,
    moveSphere () {
      Scene.moveSphere();
    }
  }
}
Controlling Vue.js content from Babylon.js
The inverse, getting Vue to react to events and data changes from within Babylon.js was slightly more complicated. To achieve this we created our own topic-based publish/subscription events system with two functions defined in our <scene-name>.scene.js file. We export the addEventListener from our .scene.js file which enables the Vue components to subscribe to events occurring inside Babylon.
let listeners = {}function addEventListener (topic, fcn) {
  if (!(topic in listeners)) {
    listeners[topic] = []
  }
  listeners[topic].push(fcn)
}function triggerEvent (topic, input) {
  if (topic in listeners) {
    listeners[topic].forEach(function (fcn) {
      fcn(input)
    })
  }
}
We can trigger these events from within the same .scene.js file using the triggerEvent() function:
/*
Extracted example from our challenge1.scene.js file where an event is emitted every frame. We use this to update the bounding boxes that surround the selected objects
*/function createScene (engine, canvas) {
  ...
  scene.registerAfterRender(() => {
    triggerEvent('tick', {
      camera: scene.activeCamera,
      other: ...
    })
  })
  ...
})
In the equivalent Vue component, we can then subscribe to this particular tick event:
/*
Extract from the <script /> section of a `<scene-name>.vue file that shows an example of this component subscribing to the tick events of a scene.
*/import * as Scene from './<scene-name>.scene.js'export default {
  ...
  mounted () {
    Scene.addEventListener('tick', (data) => {
      // do something with the data sent from Babylon
    })
  },
  methods: {
    ...
  }
}
Dismantling a Scene
When navigating away from a scene to another view within your application, it is important to destroy the existing scene efficiently.
For us, this code existed within the `<scene-name>.vue` file, and in particular, within the `beforeDestroy()` lifecycle that Vue exposes. Any code defined here runs as this component is being destroyed, which in our case, occurs when we navigate away from the view.
/*
Extract from the <script /> section of a `<scene-name>.vue file that shows how to cleanly dismantle your Babylon scenes
*/import * as Scene from './<scene-name>.scene.js'export default {
  ...
  mounted () {
    ...
  },
  methods: {
    ...
  },
  beforeDestroy () {
    // tell the Babylon engine to stop rendering
    babylon.engine.stopRenderLoop();
    // Let babylon cleanly destory the Scene
    babylon.scene.dispose();
    // clear references to the scene and enging in our component
    babylon.scene = null;
    babylon.engine = null;
  }
}
Common Loaders
If you have multiple scenes in your application, and are utilising the same models across these scenes, we found it useful to define a common loader class for these models.
Common loaders are especially valuable if there is pre-processing to be on the models each time they are used, for example, modifications to the imported materials. This saves having to write the same code in each scene you use the model and can instead define it in one common location.
/*
Example ./scenes/common/loader.js
*/// common loader for our Mayflower modelconst mayflower = function (scene) {
  return new Promise ((resolve) => {
    BABYLON.SceneLoader.LoadAssetContainer("assets/3d/", "mayflower.glb", scene, function (container) {
      for (var m in container.materials) {
        let material = container.materials[m];
        if (material.name === 'Mayflower Metal') {
          material.albedoColor = new BABYLON.Color3(0.769, 0.769, 0.769).toLinearSpace();
          material.roughness = 0.5;
          material.metallicTexture = null;
          material.bumpTexture = null;
        }
        if (material.name === 'Array - Low Poly') {
          material.useRoughnessFromMetallicTextureAlpha = false;
          material.useRoughnessFromMetallicTextureGreen = true;
          material.albedoTexture = new BABYLON.Texture("assets/textures/arrays/solararray_albedo.jpg", scene);
          material.metallicTexture = new BABYLON.Texture("assets/textures/arrays/solararray_metalicroughness.jpg", scene);
          material.albedoColor = new BABYLON.Color3(1, 1, 1);
          material.roughness = 0.46;
          material.metallicF0Factor = 0.270;
        }
      }
      resolve(container)
    });
  })
}export default {
  mayflower: mayflower
}
Then, to use this in a particular scene.
/*
Extract from <scene-name>.scene.js
*/
import Loader from '../common/loaders';Loader.mayflower(scene).then((container) => {
  var meshes = container.meshes;
  meshes.forEach( (mesh) => {
    // do stuff to the mesh, e.g. make it not pickable/clickable
    mesh.isPickable =false
  })
  mayflower_root.rotation.y = Math.PI;
  container.addAllToScene();
})
Concluding Thoughts
I hope this article has proved useful in your journey to build out your own Babylon.js applications. This was our first project using the library, and we found it a pleasure to work with. It also has a very proactive community of support available on its forums should you need further help.
